Keen Newport H2 Womens - Best Hiking Sandals for Women - Review - Loving Them!

Part of my exercise routine is to walk everyday, and I need good footwear.

In the winter I have always sworn by Keen hiking boots, but come summer, they are too hot and so are my sneakers.

I wanted the best support as well as comfort I could find without wearing socks.  That is when I discovered Keen hiking sandals.  I had heard of them, but was not convinced and continued using sneakers in the summer until this year when my feet simply got too hot. 

Best Hiking Sandal - Newport H2

✅I still Wanted a Little Girly!!

These come in many colors, and I managed to find a light pink pair as I still wanted something a little girly!  Click on the image above and you will see the many colors available.

There are many styles of this brand, but I wanted to be able to hike through trails and woods and wanted something that could breathe and still give me the support I need and just feel sturdy on my feet.  They fit me like a glove and I can tell you, I can be hard to fit as I take a size 11.

✅I Suffer From Lower Back Issues - So Proper Support is Necessary

I walk to stay in shape and to help lose weight, but I also have to baby my lower back.  If I go walking on hard pavement or hiking in the woods with flip flops or basic sandals my back will hurt the next day and so will my knees.

The Keen Newport H2, which is the one that works best for me, has all kinds of support under the foot and at the sides.  I can wear bare feet no problem and my feet get the air they need.  They can also get wet and will dry quickly.

✅No NEW Shoe Woes to Worry About...

I was able to walk and hike right away without blisters or those "new shoe woes" that make shopping for shoes difficult.. There are different adjustments if needed.

Can be Worn in and Out of the Water

Perfect for those beach hikes that are a bit stony or that walk just in the waters edge to cool down.  They dry quickly and keep their shape.

This has got to be one of the best investments I have made in summer footwear.  Having comfort while hiking especially in the summer hot months is so important.

I just wish I had purchased them sooner.

I have been wearing mine for 4 months now, and still enjoying them.  Being comfy will get you moving more!

✅Take them on Vacation 

If you go away to warmer spots over the winter, these should be in your suitcase, keep you sandals with heels for that special night, but if you want to go exploring, then take these keens with you.

✔🔺CON

Need some more brighter girly colors!

Although I noticed more bright colors if you purchase them online.

The physical stores are limited in just how much they can carry.  I am loving the colors on this page.  Just click on any of the pictures and you can see a huge assortment of colors. 

Follow the Size Chart on the Page

There is a size chart on the Amazon page.  This will tell you the best size for you.

There are a lot of great deals online right now especially with Amazon, so there is still some summer left (at least here in Ontario) but as always if you get seasonal items towards the end of the season you get the best deals!  As of this writing there have been over 3010 Reviews!


DIY Wooden Crate Bookshelf - Make Your Own Bookcase on the Cheap

If you need more bookshelves and/or space for storage, then check out this idea of using wooden crates to create storage on the cheap.

Using the unfinished crates means that you can paint or stain it to a colour you would prefer.  I have seen these at Home Depot and Wal-Mart but you can also get them online with Amazon too.

If you don't want unfinished new ones, then you can check at second hand stores, thrift shops and garage sales as these were mostly used for stacked storage before plastic totes became so popular.

Older ones once cleaned would have a great rustic patina.  It all depends on the look you are going for, fresh and chic or chabby chic.

There are so many possibilities when it comes to recycling old wooden crates.  Even with different sizes you can get super creative.

DIY End Tables

Bookshelves are not the only storage you can build with these affordable crates, you can create end tables for the bedroom or for your living space.  This creates more storage as well as a place to put your lamp.

I love this end table idea, because you simply paint and glue.  But you could also take this a step further and add some legs to raise it higher and to add some flair.

There are so many creative recycling ideas that use simple products.  If you can source a few of these you can create everything from bookshelves and end tables to coffee tables and more.  These don't have to be used just for storage in a basement anymore.

DIY Crate Bench

If you need more storage in the hallway for shoes, or a place to sit, then check out this video on using crates and some additional wood and a bit of DIY to create this beautiful piece of furniture.


This project takes a few more supplies, but is still cheaper and a great way to recycle some wooden crates.

So next time you walk by that pile of wooden crates at the Home Depot or are shopping online, just think of all the possibilities!  All the things you could make with just a few simple tools and some glue.


 How to Make a Pet Bed from Crates

I thought this was a super cute idea for your cat or dog.  The video is showing it as a dog bed, but I think a cat would love this just as much!


With the right color of paint and the added bling, this bed would fit nicely into any living area.
So get creative, save some money and deck out your place with wooden crates!


How to Fix a Cracked Phone Screen - On the Cheap

It happened to hubby yesterday.  He was always so careful with his cell phone, but literally 3 months after getting a brand new one, he dropped it on the patio!

His face went white and he said "my life is in that phone"  A little bit dramatic maybe, but I realized just how dependent we have become to these gadgets.  He uses it for work and all his contacts are in this phone.

It cracked from the corner and across.  We went frantically searching the net for ways to fixed a cracked cell phone screen and this was THE BEST SOLUTION!  CLEAR TAPE

TIP - Just make sure you have a good sharp knife to cut away any tape from the microphone.  Don't just simply wrap it around the phone, you don't want to be covering any holes.

We used packing tape, but this particular tape they use in the video is also waterproof and upon research discovered it would stick to pretty much anything such as window screens (to keep the bugs out) and tarp covers.

How to Fix a Cracked Phone Screen? - Clear Tape

If you are in a pinch, even scotch tape will do the trick, but packing tape works even better as it is wider.

You need to cover a cracked area of any screen as the shards will get right into your fingers if you have a touch screen (as most of us do now).  Plus once the glass comes away from the screen, you will start to get black streaks in the view.

Yes, you will have the Spidery lines, but it is better than having to fork out for a replacement phone.  This is actually when a phone case does come in handy!  Cases can be a bit bulky, but they definitely give your phone that added layer of protection.

Screen Replacement Kits

It is expensive to take your cell phone in for repairs, unless you have a tech savvy person in your family, you sometimes just have to work with what you have.  But if you are techy, or love to fix gadgets, I came across this kit that works for Samsung cell phones for screen replacement.

Worth checking for your phone online just in case you can get a kit if you are not liking the packing tape method above.

How to Make Plarn From Plastic Bags - Upcycle and on the Cheap

I have really jumped onto the recycling and reuse train big time.

I always have recycled, but have come across some really cool projects to reuse everyday items such as plastic bags.

You can create a product from plastic bags called "Plarn".  This is basically plastic yarn, and as you can see by the intro picture, this creates durable and beautiful bags, mats and more.

In our town, unfortunately they don't recycle these shopping bags, so I have them all bunched up and I reuse them as I can, but when I saw this project, I just had to try it!

Who knew I had a few beautiful crocheted bags just waiting to be made... stuffed under the sink?  Check out this video.  I had to stop it a few times to see how she did the cuts.

Just follow any crochet pattern you have or download on the net.  I was really inspired by this video, and also decided it was a good idea to invest in the winder, (although you could just create a massive ball)
How to Cut Plastic Bags for Plarn

 This video shows you just how to cut the plastic bags to make your plarn. I did have to stop it a couple of times to understand the folds, but once you get it, you will be amazed at how fast you can create a large bowl of this plastic yarn or Plarn.

By crocheting or knitting this type of plastic yarn, you create a good strong tote or bag.  Would make great mats as well or place mats for the table.  I was thinking how cool it would be to mix up the different colors of the bags.

The above bag uses the plain beige style bags, but if you have colored ones, throw them in there too!  This is such an awesome way to upcycle.

Ask Your Neighbors, Friends and Family for Clean Plastic Bags

I know my sister keeps them stuffed into empty tissue boxes, so I will try and make her a bag.  I love to knit and crochet, and thought these would make a great reuse and yet good looking and strong tote bag for your shopping. 

They can be wiped clean and are fun to make!

Perfect for the BEACH

What better style of bag to carry then one made of plastic for those wet towels and bathing suits. 

Make Table Place Mats

These would make cool looking place mat for the picnic table or just for eating outside.  Easy to wipe clean.

Hope I have got you inspired to watch this video and get crocheting, or knitting your homemade PLARN!


How to Make Faux Stained Glass on the Cheap

I came across this video on how to create faux stained glass and was hooked!  This has got to be one of the cutest crafts for using those old window frames or panels.  Check it out:

You don't need many supplies, but depending on how detailed you want your images, it will take some time.

But if you get a few bottles and mix as accordingly, you could make this a family project.  You could create your own drawings first to tape behind the glass, or find images online you could print and copy.  Just remember, you need the white glue and the clear glue for this to work.

You can purchase Elmer's glue at craft stores, but you can also get the larger sizes online.  The dollar store can also be the perfect source for the muffin tins as she used in the video, and the acrylic paints.

This project doesn't have to cost a lot.

Making Faux Stained Glass Windows...

The addition of the color to the clear Elmer's glue creates the opaque almost see through look once it has dried, which looks great if you hang it in a window, but it will still look awesome hung as wall art.


Where to Find Old Window Frames?

Thrift stores and yard sales are a good place to start.   When searching just ignore the color of the frames as you can paint them.  As long as the glass panels are still intact, everything else can be changed.

If you can't find any suitable and are willing to add the glass, you can purchase the rustic frames online such as below;

Most of the ones sold online do not have glass in them.

A local glass cutter would be able to install them quickly.  I just thought this was a super cool idea to add whimsy and fun to these frames.  If you hang them in the center of the window, they will catch the light, and look pretty authentic.

If you were looking for a cool way to showcase some of your drawings or art, this would be beautiful!

How to Dry Your Nails Fast - 3 Quick Ways That Work


So...  you have just completed your best manicure yet.  Stroked an awesome color on those beautiful nails, thought they were dry, and then stuck your hand in your hair or in your purse, only to then see a huge smudge! 

Been there done that... over and over.  But I have found 3 awesome ways to dry your nails fast, this will cut at least 30 minutes or more out of the drying process.

(If a smudge has already occurred, then check the bottom of this post for a video on how to fix smudged nails without removing polish and starting again.) 

1.  HAIR DRYER

Yes, if you place your hair dryer on the cool setting, this is just as good as those nail salon drying stations.  Keeping it on the cool setting is the secret for just a few minutes.

2.  ICE WATER

Before you use any nail polish, get a bowl of ice and add a some water.  Complete your nails and then place your fingers in the ice water for as long as you can stand it.  This will harden the varnish quickly.

3.  TOP COAT WITH FAST DRYING BRAND


If you use a clear top coat over your color, this will not only protect your manicure for longer, but if you purchase the "fast drying type" such as Sally Hansen Dries Instantly top coat.

By using a instantly drying top coat you will protect your varnish underneath while it naturally hardens.  The top coats are something I just started to use.

They are clear and really do protect your manicure.  Just make sure you cover the entire nail.

How to Dry Nails Fast?

Follow the above 3 ways and you will be amazed.  I personally have used all 3 and they work.  Saving you a lot of natural air drying time. 

How to Dry My Nails Fast if I Don't Have Any of the Above??

If you don't have access to a hair dryer, or top coat or even ice, simply run them under gentle running cold water from the tap.  This works too.  Don't have the water running with too much pressure, but I have found placing your fingers with your palm facing down and letting the cold tap water flow onto your nails helps too.

So if you have put off nail polish for an event or an outing because you didn't think it would dry in time, now you have 3 ways to speed that time up.

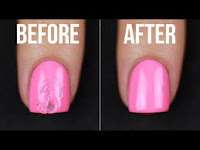
What if I Have Smudged My Nails??  Do I Have to Remove it??

I found this video super helpful about what to do once a smudge has occurred and you don't have the time to redo it.  Check it out:

There you have it.  Hopefully I have given you some great ideas for one of the most common nail polish issues.  NOT ENOUGH TIME!

In the perfect world, we would do our nails well in advance of the event, and sit around and stare into space while they dry.  But that is not the way it works.  Usually we are all multi-tasking, and if there are ways to get the nails done quickly and still look nice, then we need to be informed and armed with supplies!  Have a wonderful day out there!

How to Clean Yellowed Pillows

 When changing my bedding, I started to notice the "yellowing" on my pillows when I took off the pillow cases. It turns out it is ...