Laundry Wringer - How to Hand Wash Clothes without Power and Less Water

It all started for me when we moved my daughter 3 hours north to her new home.  She was short of money and we had an older washer and dryer that we had been contemplating replacing.

We thought .. why not give them to her while the truck is here for her move?  Sounded great.  We also decided to switch to a natural gas dryer, which now meant I had about a 4 week period without washer or dryer.

I figured I would simply wash clothes by hand for hubby and I as I don't have a car, making it awkward on a bus for a laundromat.  My problem would be the wringing of clothes.

Laundry Wringer - Perfect for Off Grid, Camping, Cottage, Low Water, No Power...

As I researched this prospect, I realized there is an entire field dedicated to hand washing all your clothes.  Campers, cottagers, off the grid, tiny houses, low water and so on need ways to clean their clothes without the expense and time of a laundromat...

There are some pretty cool accessories you can get to go back to the day of hand washing your clothes, but with a modern twist.  Since wringing out clothes has always been my issue with arthritis I came across this really cool manual clothes wringer.


I love this idea! It has 14 inch rollers, and can attach to pretty much anything. You simply feed your wet washed clothes through the wringer to get out excess water. Then hang them to dry and the drying time will be much less now that you have got rid of the excess water.

Your wrists and hands simply can't get that much water out.  I also think this is perfect for anyone with low water availability such as in summer with low wells or dry spells.  Washing machines can take up a lot of water and power.

I think this would be perfect for the cottage instead of taking cases of clothes, you can simply wash as you go.

If the weather is bad and you can't hang them to dry outside, you can rig up a clothes line in your tub area or anywhere possible since they won't be dripping all over the place.


This one is retractable so when not in use it can all hide away. I love to air dry my clothes. The only thing I do like to add is a bit of softener to the rinse water so that your clothes do not feel crunchy as they dry.

Mini Compact Hand Crank Washing Machine


I was totally stunned to find you can even take all this hand washing a step further by using a hand crank washing machine.

 I had no idea this type of thing was available. If you have problems with arthritis as I do, you don't even have to get into a tub of soapy water mushing your clothes around by hand, this little non electric machine will do this for you.

Perfect for Apartment Living Too!

This would be perfect for anyone with water restrictions, or an apartment.  I have found you can spend a lot at a laundromat, this will totally save you the money.  For under 50 bucks you can be washing your clothes without electricity or tons of water.

Pair this with the hand crank clothes wringer and a place to hang them and you are set.

This will work for delicate fabrics too.  You control the cycle with the hand crank.  This will wash 5 pounds of clothes at a time and move them around to release dirt.

I had no idea there was such a market forming for anyone wishing clean clothes without the expense of electricity and water usage.   At the time of this writing there was over 950 positive reviews.  This is definitely becoming a way to make less of a foot print on the environment.

DIY Clothes Wringer

If this all seems to much or you simply want something a bit more diy, I found this video on a do it yourself clothes wringer that should work too!


Which ever way you choose to go, I realized that we don't need to rely on a washer and dryer all the time.  There are ways to get your clothes clean without power and lots of water.

Even if you only need them at the cottage, the trailer, the boat or camping.  There is a way to clean clothes.  I love the idea of traveling to the cottage with less clothing which takes up so much room in the car.

Jeans Can Be the Hardest to Hand Wash

This is why I started researching ways to wring out clothes.  I can wash shirts and undies pretty quickly but those denim jeans are heavy and hard to wring out, which means days of drying and crunchy!

Using a hand crank wringer or something similar is the answer to my dilemma.  I am going to purchase one as they don't take up much room.  I can hand wash in a sink or bucket and then feed them through this wringer.  Shake them out and then hang them to dry.


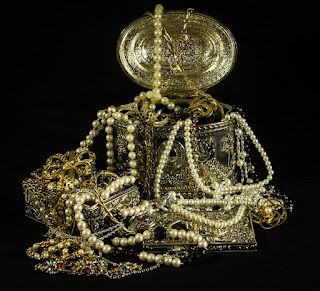
How to Pack Jewelry for Travel - Stop the Tangles Dance!

After a wonderful driving vacation through Maine, I realized just how ill equipped I was for traveling with jewelry.

At home it is easy enough as I have a wall rack for my necklaces and a couple of boxes with compartments for my earrings, and a wonderful jewelry box my dad made me years ago, but traveling is another story completely.

Don't laugh but I simply put it all in baggies in a tupperware container, so you can imagine the tangled mess from hauling my suitcases around each day as we stayed in a different town each night.

When I got home I researched either making your own homemade way to travel with jewelry or some of the affordable options on the market.

If you love to work with fabric and are into DIY, check out this video:


This makes a really personalized jewelry pack, and this will stop the tangles and keep your bling organized.

How to Travel With Jewelry - If you are Not a DIY Person!!

But I decided to research a bit further as we are heading on the road again to help my daughter move and visit soon, and I wanted to bring some of my bling with me, I checked these other options online.


Check this out, it is the best seller on Amazon right now, and for under 15 bucks you can take a fair bit of jewelry and bling, and keep them all separated.  At this writing there was over 530 reviews of happy customers.  This is perfect if you have a few pieces to take but not a lot.


I can tell you from experience, those chains and earrings will always find a way to dance and get tangled.

I personally am interested in the hanging one that I can simply roll up and take with me in my suitcase and when I get to the hotel or wherever I am staying, I can hang it up in the bathroom and be able to quickly choose my pieces.  This one holds a lot of pieces.

I actually have decided this would be a better option at home too.  This way I don't have to pick and choose which pieces to take with me, and don't have the bother of having to put them all away when I get home.

It all depends on how many pieces you need to travel with or store.  I personally love my bling, so the larger the travel bag the better but it can't take up too much room either.

How to Pack Jewelry for Moving - Don't Leave it in the Jewelry Box - It will be a Mess - Been There Done That!

If you think a typical jewelry box will survive a move, I can tell you it won't.  It may look OK, and you may have packed it tightly in a box, but somehow on that trip to your new destination they will tangle and you will be faced with a mess.


Start a few weeks before the move, and this would also be a great time to clean out your jewelry box or storage drawer.

Put a clean towel on your table and then put a few pieces at a time, and get rid of broken things, dust and dirt.

If you have the time it might be a good time to use some jewelry cleaner to make your pieces shine again.

Purchase these affordable hanging jewelry pockets and place your pieces in the pockets. Then simply roll them up and place them in a packing box, or your suitcase. Pack the jewelry box separately.

When you get to your new place, simply hang them up in the closet until you get sorted and unpacked.  As much as I love my jewelry box my dad made me years ago, I have decided I will keep my jewelry in these hanging pockets because it makes it easier to match up with your outfit for the day if you hang them in your closet or even the back of the door.


This ultrasonic cleaner will quickly clean your jewelry pieces as well as glasses and coins.  You only have to add water and the machine does the rest gently.

At this writing there were over 3100 happy reviews!  Moving would be a great time to get this job done and there really is no labor involved on your part.  I will make my dad's jewelry box still a part of my room as it means a lot to me, but my day to day bling will hang in one of these hanging pouches.

Pick a time before your move to sort out your jewelry and clean it, and then pack it fresh into hanging jewelry pouches for the move.  If you are using a traveling hanging box for your clothes, these pouches could go with your clothes.

If many of the pieces are valuable, then roll up the pouches and keep them with your personal items on your person at all times.  But this way they don't get damaged.

How to Untangle Jewelry

If your necklaces have already done the mysterious dance and got tangled, there is a way to get them apart.  I know with me a couple of delicate chains ended up in a drawer because I didn't want to break them and yet I couldn't wear them.

What You Will Need:

Baby Oil - any brand

Clean towel

Sewing needle

Some Patience!

Method:

Place the tangled mess on a clean towel.

Liberally pour baby oil over the tangled knots.

Work it into the knots with your hands, (yes you will get oily but your skin will feel great!).

Then with the needle gently begin to pick apart the tangle.

The baby oil makes the chains slide easily.  Yes it will feel oily, but they can be cleaned afterwards.   This oil trick really does work as a lubricant for separating the chains without breaking.

How to Travel with Jewelry? 

Invest in a few affordable roll up bags, or make your own and not only make it easier to find the right piece for the right outfit, but enjoy your trip without the worries of tangles or large cases taking up to much room.


How to Wash a Backpack - Get Rid of the Stains and the Smell - Good as New

If you use your backpack all the time, whether for school or some serious hiking and backpacking through the woods, it will get dirty.

Leaking food containers, weather, dropping it in dirt, and simply day to day wear and tear will eventually lead to a dirty pack and sticking zippers.

I have found the perfect way to clean and refresh and preserve your pack for another season!

Can You Wash a Backpack?


Yes you can!  Since I prefer visual lessons, I found this video that is short and sweet and to the point.


How to Clean a Backpack

The trick is to use the right products.  As tough as these packs are, they can be destroyed with harsh chemicals.


Check to see if yours has a cleaning label and follow those instructions first, otherwise start filling the bathtub as the washing machine will be to harsh on it.

I have also found that you can get the special products online.  Worth the investment especially if there are a few packs in your household.


Having an old toothbrush around is perfect for the seams and some of the stitching especially if you have food or beverage leaks that get into the stitching and seams.


Sometimes zippers on packs can get sticky from spills, dirt, grime and more. After washing it is good to lubricate the zippers to protect them from damage or wear.


Vacuum Your Backpack

When you empty it, make sure to get into each pocket and then take a vacuum and really get rid of that built up dirt in the corners of pockets before you place it in the tub of water.

Open out all the pockets and then follow the video to gently wash.

Spot Clean with the Oxyclean

Take a old toothbrush and make a solution of oxyclean and some water and use this on the extra dirty bits especially around the seams and edges.


Do not wring your pack, simply swish it around in the tub and then empty and refill with clean water for rinsing.

Find a Place to Hang the Backpack

Away from heat and direct sun.  Somewhere where it can totally dry out as you don't want to trade a dirty pack for a moldy one.

Allow lots of time before you need to use it again as it may take a couple of days to totally dry.

Once Dry Lubricate Zippers

Once it it totally dry (check the pockets and seams) then you can use some zipper lube to keep them running smoothly.

How to Clean a Backpack?

With a bit of patience, a few products and a bathtub, you will have that pack looking great in no time.  This works for kids school packs too.  Sometimes all they need is a good clean instead of replacing them.

Also check out how to wash a baseball cap and how to make a baseball cap holder for some more great ideas to make life just a bit easier!

How to Wash a Baseball Cap - By Hand is the Best

If you or someone you know loves to wear their baseball caps, you can imagine just how grimy they can get.  I personally have found sweat stains to be the worst not to mention the smell!

After much research I have found the best way to wash a baseball hat or cap is by hand, but don't fret, this is not days of scrubbing, it is quite quick and if you have the right ingredients around, you will be amazed by just how clean you can get them.

The washing machine and dryer can be a bit harsh on a hat, so try this method first before resorting to the machines.

✅What you will Need:

Bucket (you can use the sink but i found a bucket works best)

oxi-clean

shampoo
old toothbrush (to gently scrub stains)
towels

✅Method:

Step 1 - Fill the bucket with warm water (not too hot or you may shrink the cap) and add the oxy-clean.

Step 2 - Submerge the cap in the prepared bucket and let soak for about 10 minutes.

Step 3 - Take a toothbrush and some shampoo and gently scrub sweat stains in the cap being careful not to scrub too hard as you don't want to disturb the stitching.  Shampoo works super well on sweat stains and the oxyclean brightens.

Step 4 - Place back in the bucket of water to soak for about 20 minutes.

Step 5 - Empty bucket and fill with clean cool water and rinse the cap of any soaps especially the shampoo.

Step 6 - Do NOT Wring the cap, but gently let it drip from your hands and then place in a thick towel to soak up excess water.

Step 7 - Find something to sit the hat on to keep its shape with a towel underneath and let air dry.

Note:  You can try and speed things up with a hairdryer, but it is best if you can let it dry on its own.

Shape the hat, the easiest is to put it on your head once dry.

Cap Washer for Top Rack in Dishwasher


If you have a few caps to wash and are not a fan of the bucket method above, you can invest in a cap washer that you place the cap in and then place on the top rack of the dishwasher.

This will keep their shape and clean them thoroughly as well.

At the time of this post, there were over 1800 reviews for this product.

This can also be used to store a special baseball cap so that it doesn't get dirty or misshaped.

✅How to Clean an Old Style Cap with Cardboard Brim

If you have this style of hat, you have to be more careful as the brim simply cannot get wet as the cardboard will break down.  But don't despair!  If you love this cap there is a way to bring it back to life and clean it.

What you will Need:

Clean white cloths for cleaning

Dark towels to dry your hat on (just in case any dye leaks off hat)

Old Toothbrush

Gentle detergent such as Woolite

Method:

Step 1 - Make a mixture of woolite and some water and take a toothbrush and gently rub this detergent mixture into the hat especially the sweat stain areas.

Step 2 - Do not over wet anything around the cardboard brim.  Dip the toothbrush into the cleaning mixture and dry slightly and then gently but quickly rub along the brim trying not to over wet this area.

Step 3 - Rinse

Step 4 - Take the toothbrush and with clean water go over the hat again to get rid of soap residue and gently do the same over the brim.

Step 5 - Take a clean cloth and soak up any leftover dampness

Step 6 - Leave to dry.

✅Once Clean .... Use Some Hat Saver Spray


This spray is safe to use on hats and caps, and will prevent sweat stains and repel dirt and oils which will keep your baseball caps and hats looking their best between washings.

It is best not to wash your ball caps too often, so if you wear yours all the time, consider investing in some hat saver to stop the sweat stains that lead to a smelly hat.

Also check out my post on how to make a baseball cap holder


Hat Rack DIY - Homemade Baseball Cap Holder - Awesome Project

As I was cleaning out the front closet for our upcoming move, I started an avalanche of baseball caps and hats of all descriptions.

My hubby would get them through work and from friends and as gifts and over the years he had built up quite a collection.

But storing them up on the closet shelf was not doing them any favors as some had been flattened.

DIY Baseball Cap Holder

I was looking for ways to store these in such a way that you could see them, display them and even wear them.  Not only would this get them where you could see them, but would free up valuable shelf space for other things.

Check out this Video:

Homemade Hat Rack

This system could be used for any hats or caps.  I love the idea of actually displaying them on the wall as many hats are beautiful.  This becomes what I call functional art!

You could use this for baseball caps too and place the clips closer together.  You can get super creative.  You can get most supplies in the hardware store or online such as with the bar clips.


Hat Holder - If you Don't Like DIY... 

If diy is not something you enjoy, or you don't have the wall space or your landlord is not thrilled with holes in the wall, there is another affordable option...


What I like about this product is the fact there is no damage to the door or wall.

It clips over the top of the door and under the bottom and doesn't get in the way. You can display your hats on a door or place them on the inside of a closet door. Easy to grab and use.

Hat Holder for Under 15 Bucks!

As I did my research I also discovered that sometimes you don't need to to diy, as the above product is affordable for all my hubby's baseball caps that he adores.

Also as of this writing there were over 2200 reviews!  Obviously a lot of people are looking for ways to store caps and hats.

✅ Cowboy Hat Rack


If cowboy hats are more your thing, you can get one of these hat holder for wall racks that will do the trick and show off your hats.

This style of hat rack is a bit more money, but I still found this type for under 20 bucks.  So using your hats and caps as displays will also double as artwork for your walls!

Baseball Cap Holder

For myself, I think I will skip the diy as I don't want any holes in the wall and go with the over the door and under the door rack.  This holds a lot of caps, and I can place this on the inside of any closet door.

This not only displays all the hats or caps, but will give me back some valuable room on the closet shelf.  Now hubby can see all the caps he owns.  A Win Win situation!

What if you Simply Want Storage and not Display for your Baseball Caps?

Maybe you don't want them all on display but want to keep them safe for a move, or simply to store to keep them clean and the dust off.


This bag can fit easily on the closet shelf, or under your bed.

This is a good option if you only want to display and wear a certain few of your hats or caps, but want to keep the special ones safe and clean. An affordable way to keep them neat, clean and tidy with a see through bag.

Many Options for a Hat Rack or Baseball Cap Holder

So, after my research I have now been educated to the fact that you can simply make your very own hat rack diy, or you can purchase specialty products that are affordable to store them properly, whether on display for all to see or simply easy to get off the inside closet door.  There is a way!

How to Clean Yellowed Pillows

 When changing my bedding, I started to notice the "yellowing" on my pillows when I took off the pillow cases. It turns out it is ...